These easy photography tips from Meg of Snap Happy Mom prove that you don't need to be in manual mode to take a good picture. Meg is dedicated to teaching moms about photography (AKA: scary-sounding, but easy & awesome things like exposure compensation), so they can feel confident with a DSLR camera in-hand.
. . .
Are you unhappy with your photos, but totally overwhelmed by manual mode? My best recommendation for moms that want to brighten up their photos (without the pressure of manual mode) is to use exposure compensation. It's so handy! Exposure compensation is one way to make a picture brighter or darker, without using manual mode.
In the semi-automatic modes, your camera is deciding how bright or dark the picture should be. It’s deciding this based on how much light it senses in the scene, and then trying make that picture “just right” – not too bright, not too dark.
But we all know the camera doesn’t do a great job of estimating how bright it should be sometimes! Complicated lighting scenarios and backlighting often mean the picture is darker than you would like. Exposure compensation is an easy way to override the settings in the semi-automatic modes.
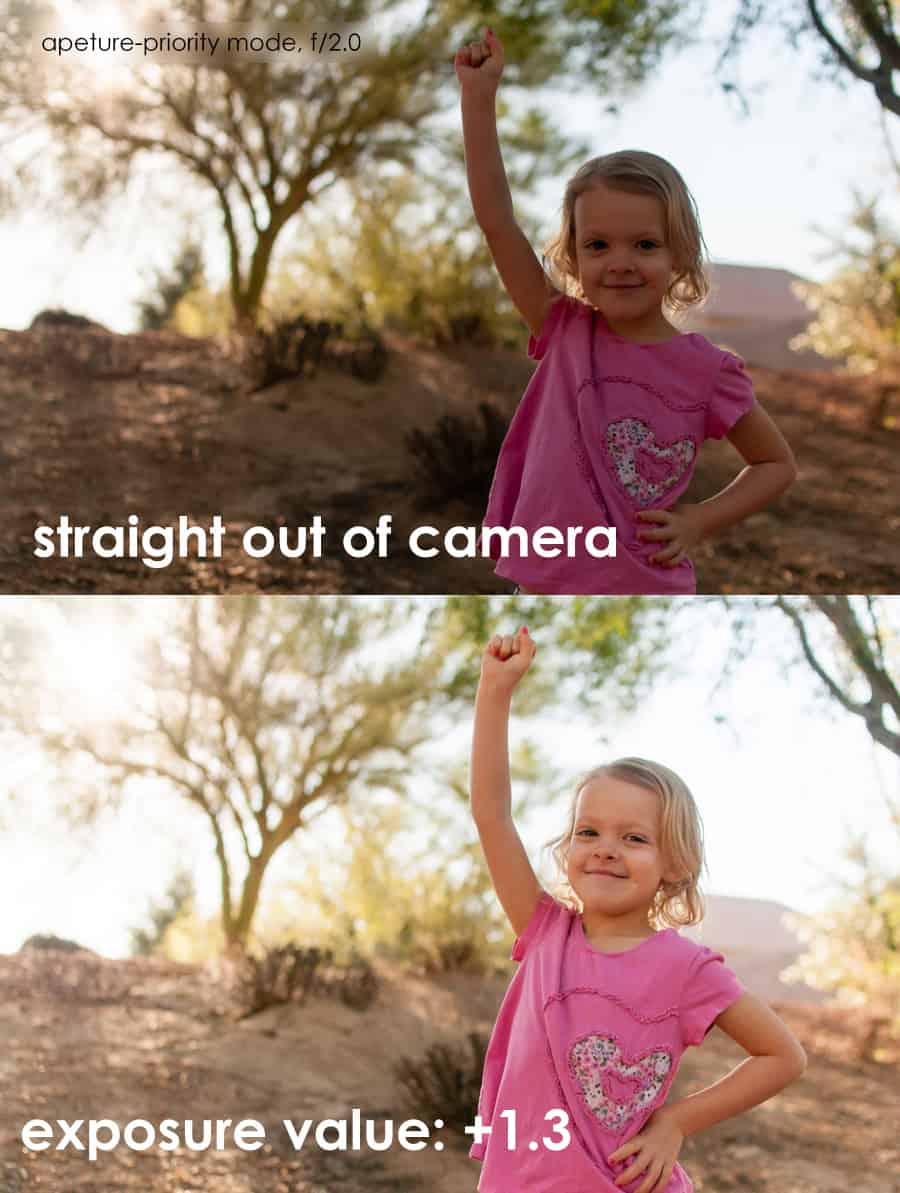
Here's an example: I'm shooting in Aperture-priority mode, and I chose an aperture of f/2.0. My daughter is playing in the shade, but she is backlit. That bright sky behind her is confusing the camera's sensor, which means the camera is making everything darker than I want it to be. I would rather have her face and expression be well-exposed, instead of the tree and landscape behind her.
I can use exposure compensation to override the camera's exposure and make it brighter, all without manual mode. All I did was dial in +1.3 with the directions below, and I got the exposure I wanted on the second picture. You can too with the directions below!

How To Use Exposure Compensation
Let's begin...
1. Get in a Semi-Automatic Mode.
Start in Program Mode, Aperture Priority Mode, or Shutter Priority Mode. Just a reminder that the "Auto" mode is fully automatic, so it doesn’t support exposure compensation because the camera is making all the decisions.
2. Take a picture as you normally would.
Set your ISO and whatever shutter speed or f-stop you want to use. Take a picture and check it. If it’s too dark or too bright, you can use exposure compensation! (Of course, you can also adjust your f-stop, shutter speed, or ISO, but this is assuming you already had those settings where you wanted them, or cannot adjust them anymore.)
3. Use the +- button in combination with a dial to adjust exposure compensation.
Usually, you push in the +- button with one finger and roll a dial at the same time.
If it’s too dark, then roll the dial to the + side.
If it’s too bright, then move the dial to the – side.
Light is measured in “stops” and moves in “thirds of a stop”. Basically, ⅓, ⅔ and 3/3 are abbreviated and rounded to .3, .6, and 1 full stop, each to the plus or minus side.
4. Retake the picture and adjust again!
I usually start with plus or minus .7, depending on the situation, and then adjusting accordingly. You can see the changes by scrolling through your files and viewing the screen information- the changes will be listed next to EV (exposure value).
I often recommend exposure compensation as a “baby step” to learning manual mode. You get the benefit of learning how things work together, but you still have a pretty high probability of getting a keeper.
Exposure compensation is literally adjusting one element of exposure for you, which is what you would be doing in manual mode anyway. But it’s a great step to help you get comfortable making incremental changes to get the exposure you want!
Quick Tip Photo Cards
Need a reminder of how to use exposure compensation on the go?
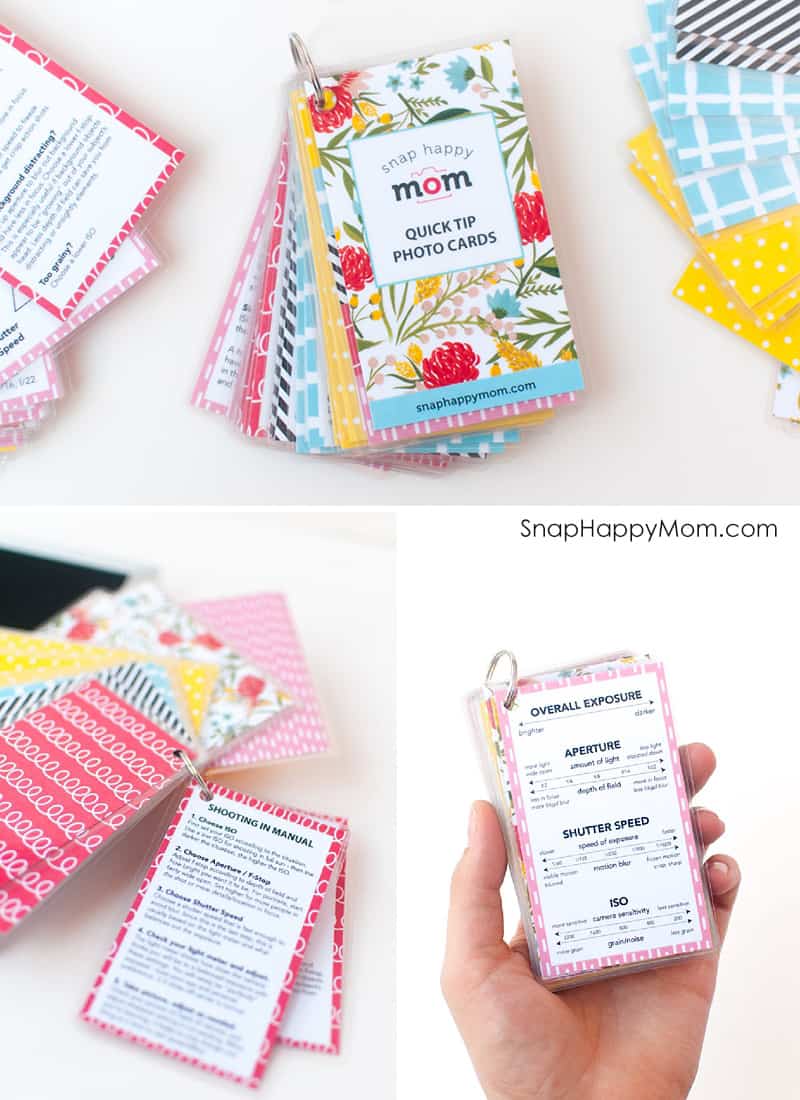
Check out these handy photography “cheat sheet” cards for moms over on Etsy. I created these cards to provide you with all the things you might need to reference while you’re shooting. There’s a whole page about exposure compensation, including a reminder about which way you should adjust for which situation, to help you take better pictures.

And, exposure compensation is only one topic discussed in these handy cards. The cards cover all sorts of topics that any mom can use: avoiding blurry photos, working with kids, lighting, how exposure works, what aperture means, manual mode troubleshooting, and more!
These cards are intended to fit in your camera bag or pocket, so that they are easy to use and carry with you. Plus, they are super cute and color-coded, which makes it more enjoyable, right? Right!
Check out the Quick Tip Photo Cards here - they would make a GREAT gift for a mom who’s learning how to use her new camera! Or... you can treat yourself. 🙂
![]()
 Snap Happy Mom is dedicated to helping moms (and Dads!) learn how to take better pictures of their families. Meg wants you to have pictures that matter to them, and that capture those precious moments of parenting and childhood. No matter what kind of camera you have or how experienced you are, she can help you feel more comfortable behind that camera.
Find Meg online here →
Blog | Facebook | Instagram | Pinterest | Twitter
![]()
You Might Also Like
Check out these other great posts from Snap Happy Mom:
Looking for even more photography inspiration? Check out these great tips and tricks:
Using Continuous Focusing Mode for Better Action Shots

How To Avoid Red Eye In Photos

Using White Balance To Make Your Photos Look AWESOME

![]()
Pin this post for later:


