
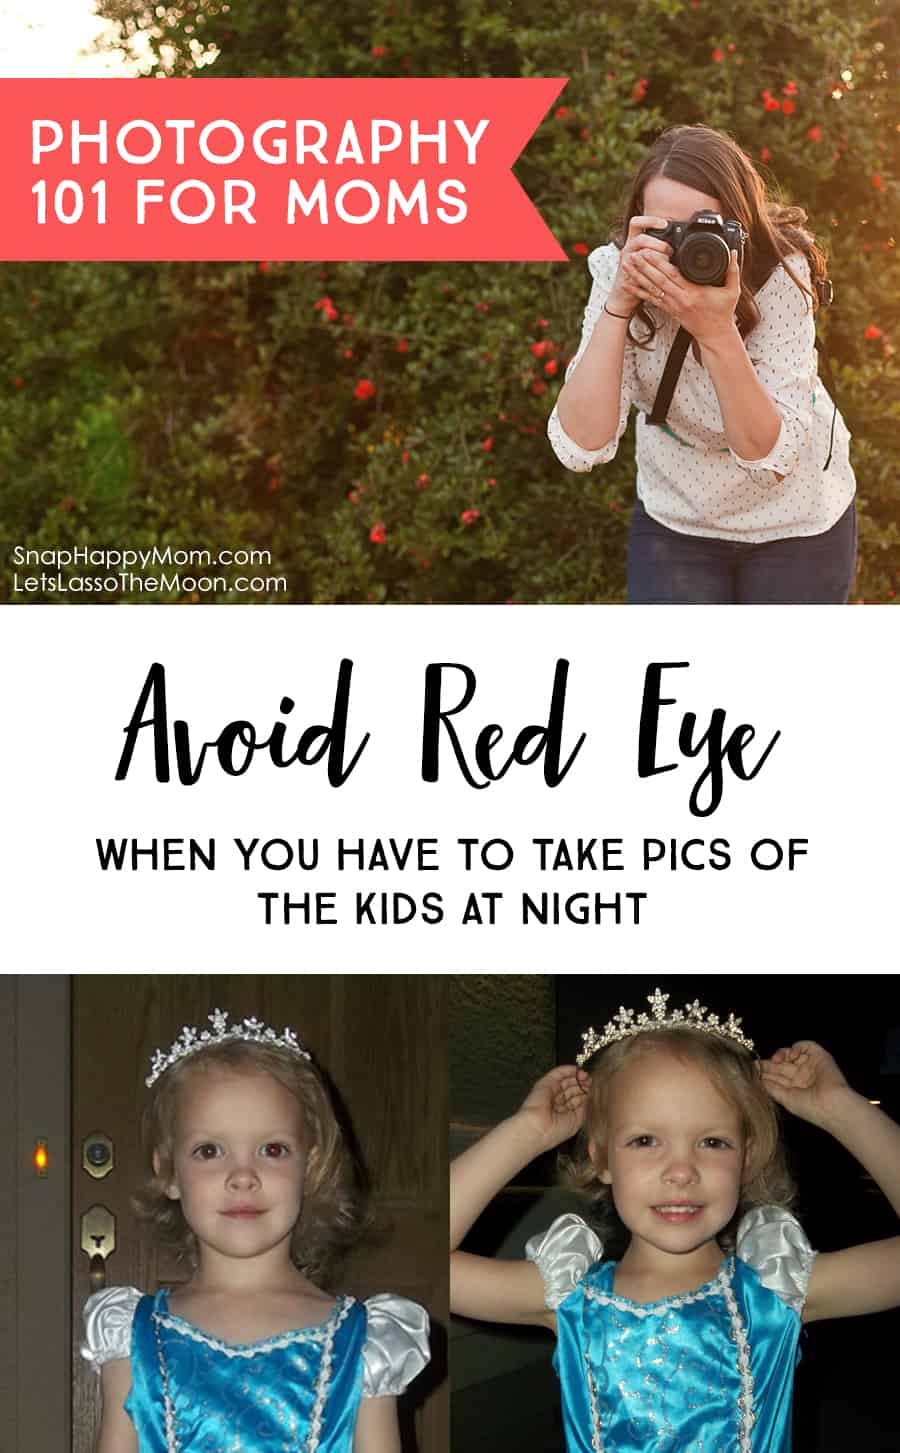
Have you ever had a photo you love show up with dreaded red-eyes? Find out how to avoid red eye in photographs with tips from Snap Happy Mom below.
Little things can make BIG differences in your photos! Meg has a knack for simplifying elements of photography into mom-language, and even wrote a photo course just for moms. She's a believer that moms can (and should!) take great pictures of their kids.
. . .
Red eyes in photos are one of those dreaded things that ruin an otherwise great picture. And guess what? You don’t have to deal with red eye if you don’t want to. Read on for super simple ways to avoid it.
Why Red Eyes Happen in Photos
I don’t want to get too technical on you, but it’s important to first understand why red eyes happen if you want to avoid them.
Red eyes only happen when you use your camera’s flash in dim lighting. The "red eye effect" comes from the on-camera flash bouncing off the back of the eye and reflecting right back at the lens.
If it’s dark enough to use a flash, then the subject’s eyes are already dilated to let in as much light as possible. When a flash goes off, the pupils can’t contract quickly enough to deal with that burst of light, which means that most of that light is bypassing the filters in the eye and reflecting right back at the lens. It looks red because the flash is illuminating the red blood that supplies the retina with nutrients.
Red eye is also far more likely to happen with camera phones and point & shoot cameras than with DSLR cameras. This has to do with the angle of reflection - the lens and the flash are so close together that the eye will nearly always reflect that flash back at the lens. DSLR cameras have enough space between the pop up flash and the lens that it's a lot less likely to reflect that red tint back at the lens.
But enough about what causes red eye: here are some tips to avoid it.
Four Tips To AVOID Red Eye In Photos
1. Stop using your flash
The easiest way to avoid red eye is to not use flash at all! I know it sounds simplistic, but you’re guaranteed no red eye effect because there will be no burst of flash to reflect back to the lens.
So, consider what you might need to do to take a picture without flash. You might need to move locations to a brighter area, or turn on more lights in the room.
You especially shouldn't be using flash instead of natural light in the day time. If the camera thinks you need a flash inside your home during the day, then you definitely should move to a better location - either outside in the shade or closer to a window.
If you feel like you struggle with how to find good light for your photos, then you should check out my photography course for moms. I have a whole module devoted to light - how to find beautiful light outdoors, how to use light well indoors, and even when you SHOULD use that flash. Check out A Mom's Guide To Better Photos here.

2. Take pictures earlier in the evening.
One of the biggest things you can do to avoid red eye is take your pictures earlier in the evening. Anything in the late afternoon to evening can be taken without a flash, which means you won't have to deal with red eye.
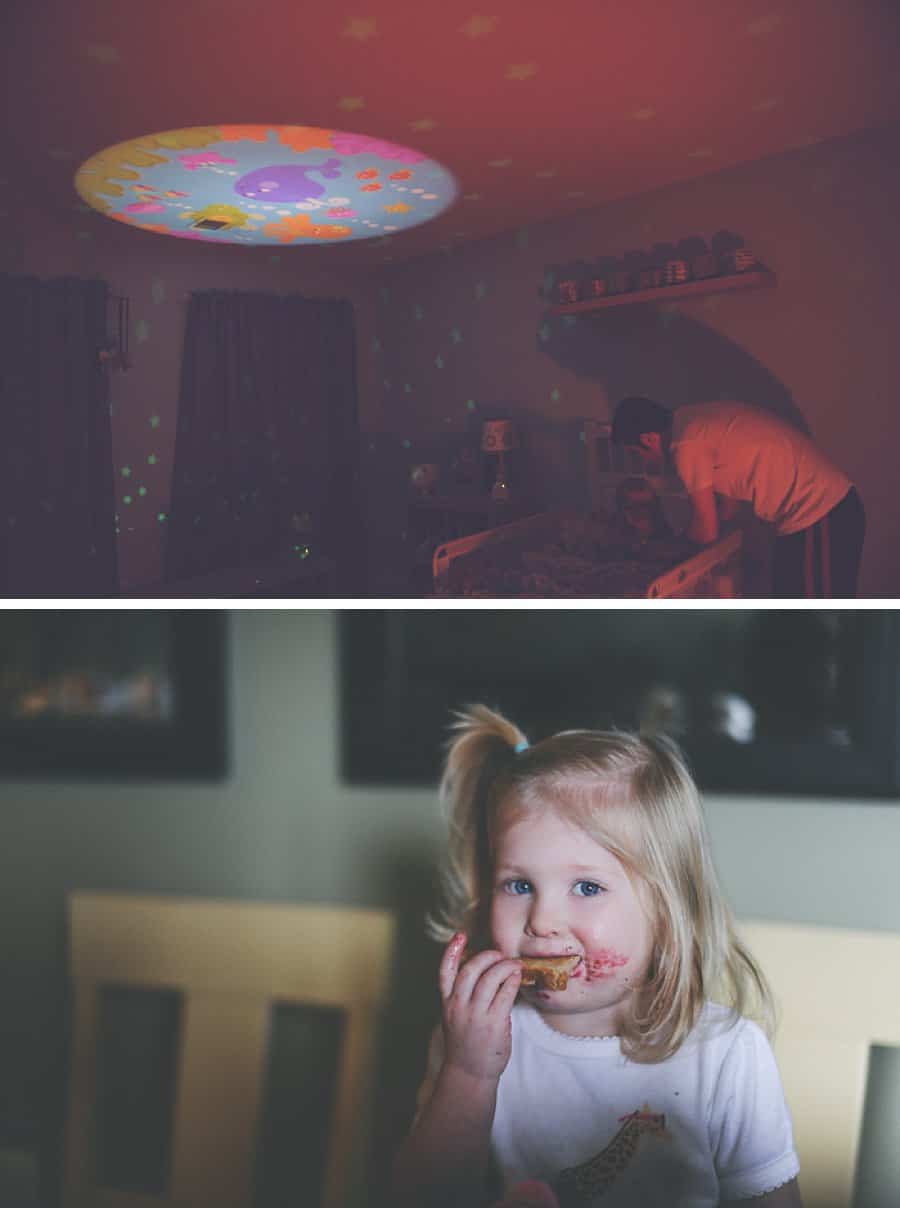
So, if you can think ahead, take pictures in the late afternoon instead of the the dark night. A really good example of this is Halloween night: if you can take all your pictures in the late afternoon, you won't have to deal with red eye and flash when it's dark. Even just 30 minutes before dusk will make a huge difference in your pictures, as seen below.
I purposely used a smartphone and a point & shoot camera for my example pictures here, to show you that you don't need a different camera to take better pictures.

3. If you have to use flash, then add more ambient light in your picture.
Ambient light is the light that is around your subject, but not necessarily directly on your subject. So turn on the all lights in the room! If you're outside, consider standing near a street lamp or porch light.
Having more ambient light helps in several ways - first, more light means your camera won't necessarily pop up the flash, because the camera's meter is sensing more light in your photo in general. Second, more ambient light means your pupils will contract to manage that continuous light, which means that the flash can be used without it causing a red eye reflection.
This is a good chance to be creative and think outside the box. Can you have your subject stand in a different place in the room, closer to a lamp or canned lighting? Or can you jimmy-rig a moveable lamp or floor lamp to point at your subject? I did this for my daughter’s first birthday – I leaned a tall floor lamp against a chair to get all that light on the birthday girl, so that I didn't have to use flash and have red-eye in her birthday pictures. My example below is still in an outdoor situation though - for the bottom picture I moved her closer to the porch light, which gave her eyes enough light to adjust before the camera flashed.

4. Capture hidden light by raising the exposure on your iPhone.
The flash on your smartphone is notorious for causing red-eye because it's just so close to the lens. If you have to take a picture in a dim situation, consider this iPhone trick to make it brighter without flash. I’m always surprised by how few of my friends know this trick.
Simply tap the screen where you want to focus (on your subject). Once focus locks on your subject, a little sun appears to the right of the focus box. Slide your finger up to raise the exposure of the picture and let in all the available light. It’s so easy, and you’ll see your screen visually change and get brighter as you slide up. This is a great way to make your picture brighter without having to use the flash! You'll see a huge difference if you use this in dim situations, although it obviously doesn't work if it's totally dark out.
What you put into photography is what you get out of it. If you feel like you struggle with pictures on your smartphone, or you don't know how to find good light for photos, then you should check out my photography course A Mom’s Guide To Better Photos. This class gives pro tips for moms with any type of camera, and I talk a lot about light and how to use it in your photos. There are three entire lessons devoted to finding and using beautiful light - indoors, outdoors, and even when you SHOULD use that flash!
Get more information about A Mom's Guide To Better Photos here:

The course is intended for moms that want to take better pictures of their kids, but don't have time to learn the intricacies of photography. If you're overwhelmed or frustrated with your camera, let me teach you some quick things that will improve your pictures immediately. You can feel confident with a camera in just a few hours!
![]()
 Snap Happy Mom is dedicated to helping moms (and Dads!) learn how to take better pictures of their families. Meg wants you to have pictures that matter to them, and that capture those precious moments of parenting and childhood. No matter what kind of camera you have or how experienced you are, she can help you feel more comfortable behind that camera.
Find Meg online here →
Blog | Facebook | Instagram | Pinterest | Twitter
![]()
You Might Also Like
Check out these other great posts from Snap Happy Mom:
- AWESOME CHILDREN’S PHOTOGRAPHY TIPS
- DSLR CAMERA GUIDE FOR MOMS
- TIPS TO MAKE FAMILY PICTURE DAY A GOOD EXPERIENCE
Don't you feel a lot more photo savvy now? Thanks, Meg, for sharing your expertise! Photos are such a huge part of documenting our journey so any tips that can help us improve in that area are great. Here are a few more photography tips we have shared in the past that you might find helpful:
7 Family Nature-Portrait Photography Tips