These simple photography tip from our affiliate Beryl Ayn Young (creator of the online Momtographie course) will transform your photos FOREVER. Click here to see if registration is currently open for Momtographie and save your spot.
I vividly remember the excitement that welled up inside when I placed a DSLR camera in my hands for the first time.
Naively, I thought that by upgrading my camera, I’d automatically be upgrading my photographic output too.
You can imagine my surprise when many of my first DSLR images turned out to be dull, lifeless, and lacking the professional quality I dreamed of when I brought my camera home.
It’s a hard lesson to learn that even the best lenses, gear, and cameras money can by can STILL leave us with photos that need something more.
I used to think more meant I needed better equipment. To my surprise, I learned that no matter what camera I had in my hands, all I needed were a few key skills to edit and enhance my photos instead.
At first, I thought editing photos was cheating.
All the pros told me I needed to ‘get it right in camera.’ When that didn’t happen, time and time again, I’d beat myself up with frustration. Overwhelmed, I felt I was destined to live a life of albums filled with terrible photos of my kids and family.
Today, I’m here giving you full permission to let all your past thoughts about photo editing go. Explore a bit with me! I’ve learned that photographing kids (especially young ones) is hard and it’s even harder to get the perfect shots when they're playing a game of cat and mouse with the camera.
Editing a blah photo into something beautiful can be fun. It doesn’t have to take a lot of time or even be hard!
Editing can be the difference between a photo we want to delete and one we'd love to display on the walls of our home.
If you’ve ever looked at your photos and beat yourself up over how they just need a little something more, there is hope.
Moms don’t need to invest in expensive software programs to make a big impact with their photography. You CAN indeed salvage photos you first thought were throw-aways.
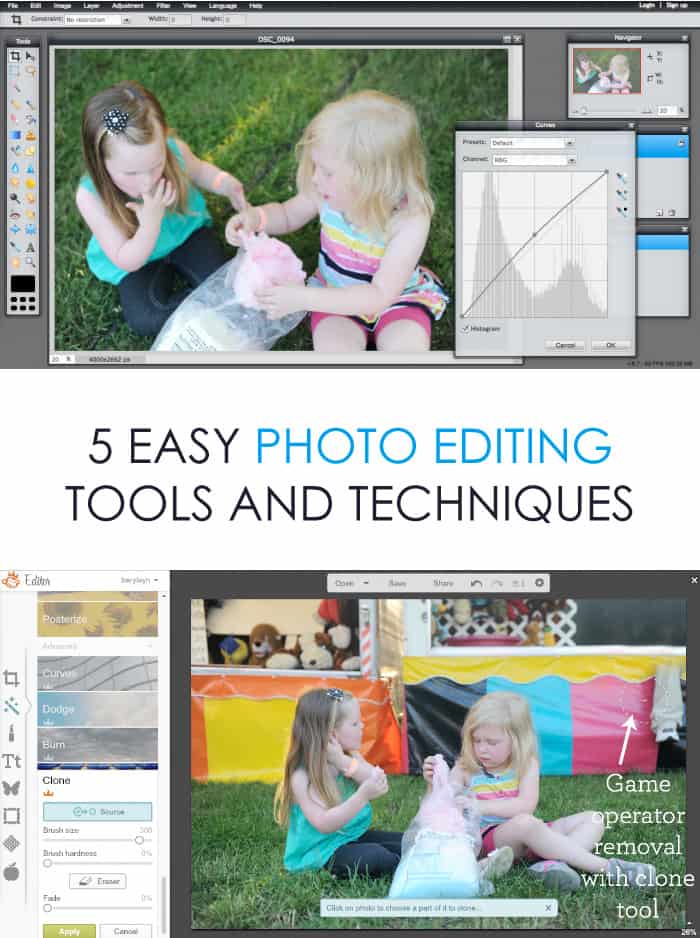
5 Photo Editing Tools And Techniques:
Edit your photos with professionalism and ease. Below are a few tools and techniques I encouraging you to try today!
1. WEBSITE: Picmonkey (FREE Tools or Ad-Free "Royal" Version Available)
This is hands down my FAVORITE resource for moms who want to edit their photos from anywhere without stress. Picmonkey provides visual guides for what each tool does to an image. Their slider technology for tweaking and touching up images makes customizing edits a cinch. With many free tools and techniques and hundreds of others available for a very affordable annual fee, Picmonkey is my go-to resource for photo editing and design.
![]()
2. WEBSITE: Pixlr (Completely FREE)
Another online based photo editor is Pixlr and the best part is that it is completely free! There are a range of interfaces, but I’m partial to the ‘Editor’ interface because it looks and feels a lot like Photoshop, giving you a chance to explore more advanced tools without spending money on one of the more expensive programs until you know you’re comfortable. I teach my entire ‘Radiate’ editing course using this site. It’s a great way to learn the building blocks of editing.You'll learn the how and why behind your favorite techniques.
![]()
3. TOOL: Curves
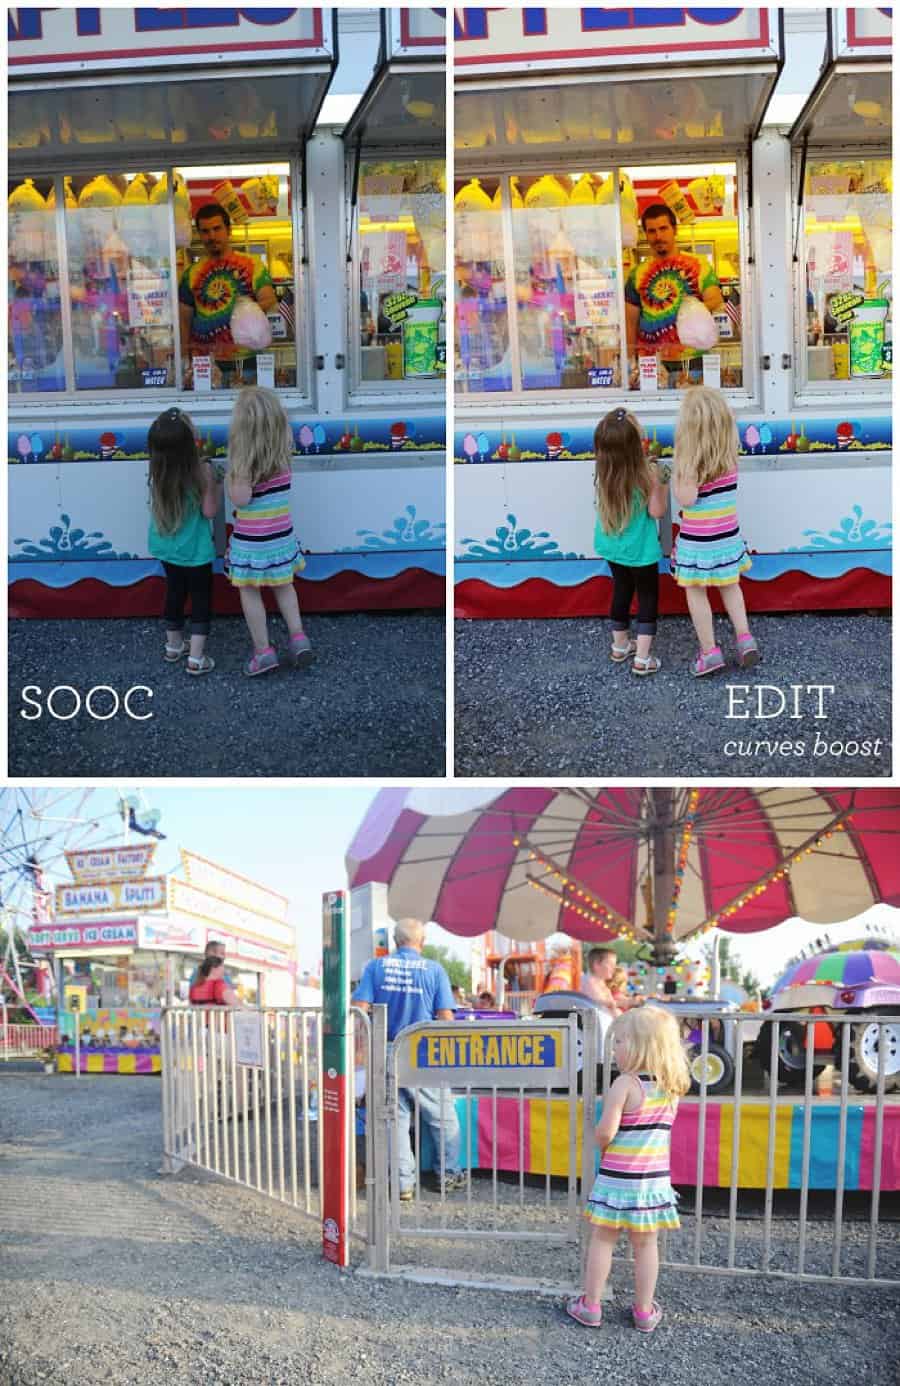
This is my favorite tool when it comes to slightly brightening a dark image. I use this over other ‘exposure’ tools because I find Curves retains more color and clarity than some of the other options.
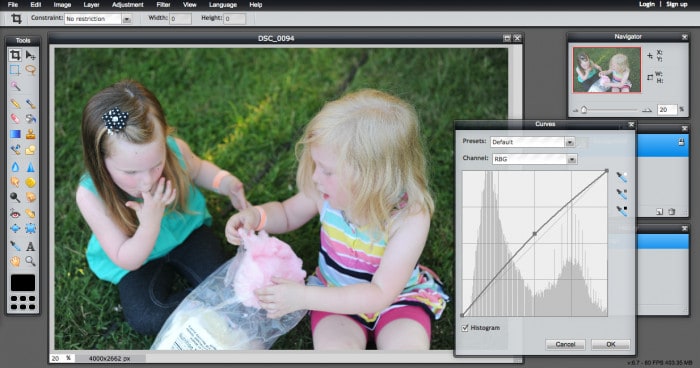
When you open Curves, you’ll typically see a graph with your photo’s histogram. To brighten, simply mouse over the midpoint on the curves line and drag it up slightly. As you do this the mid tones of the image will lighten and you should see a preview of how light the image will become.
In Pixlr: Open your photo and go to 'Adjustment > Curves' to get to editing!
In Picmonkey: Open your photo and go to 'Effects > Curves' to get to editing!
![]()
4. TOOL: Clone
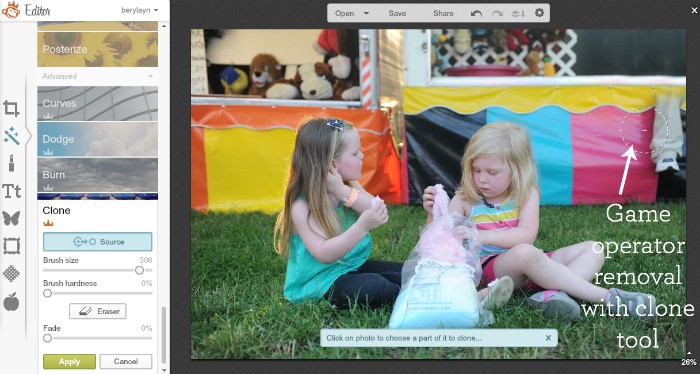
Ever wonder how photographers fix skin blemishes and/or remove unwanted background distractions? This tool is it!
The basic way this tool works is that you take a sample of an area you love and paint it over the area you don’t. So if you have a beautiful background of trees with a horrid street sign ruining the view you can ‘sample’ the trees (in Pixlr you hold down the ‘alt’ key while clicking the mouse to take your sample) and then paint over the sign with the sample you just took to make it magically disappear.
In Pixlr: Open your photo and go use the stamp tool on the toolbar to get to editing!
In Picmonkey: Open your photo and go to 'Effects > Clone' to get to editing!
![]()
5. TOOL: Effects
In the age of Instagram, fancy photo effects are not hard to come by. We are so used to seeing bold pops of color, vintage hues, and moody black and whites. The tricky part is manipulating effects so that they add to a photo, help tell it’s story, and still make it look as natural as possible.
Picmonkey makes applying effects and filters as easy as ever with sliders that allow you to edit their intensity in just a few seconds.
![]()
Want a bit more hand-holding through the editing process?
If you’d love some more new tips, tricks, and techniques for editing your family photos, join me for the next Momtographie session.
In this guided online class, I’ll share the key ingredient moms should add into their photo taking recipe books to capture beautiful memories both big and small!

![]()
 Meet Beryl Ayn Young
Hi I’m Beryl. Mom, photographer, and teacher who wants to help you beautifully capture the life you love. I remember how excited I was the day I brought my first DSLR. I thought I’d take my camera out of the box and it would take amazing professional quality photos. After months of trying to figure out the camera on my own I was still frustrated with images that were blurry, dark, dull and out of focus.
Now, I’ve taken my expertise in teaching and my passion for photography to develop a system that breaks down technical photography in a way that will quickly build your confidence behind the lens. My goal with Momtographie is to help as many women as possible learn to love using their DSLR cameras in manual mode and love the life they’re living too. Learn more about the course here!
![]()
Momtography
You want to be present for your family and capture everyday moments full of meaning. You want to create a snapshot of your life with all its beauty, mess, and realness right now without fumbling with your camera before the moment is lost. And you can. It’s not as hard as you think. Promise.
I remember what it was like to feel like I had all of the tools at my fingertips, only to produce photo recipes that always fell flat of my expectations. I was longing for photos that my family would rave about for years to come.
My good friend Beryl created Momtography™, an online class that came out of her trial and error in the photographic kitchen. She's mentored and taught thousands of women how to love their photos and their life.
Check out some of the before & after examples from her class participants!
BEFORE & AFTER PHOTOS FROM EVERYDAY MOMS
![]()
Pin it:
