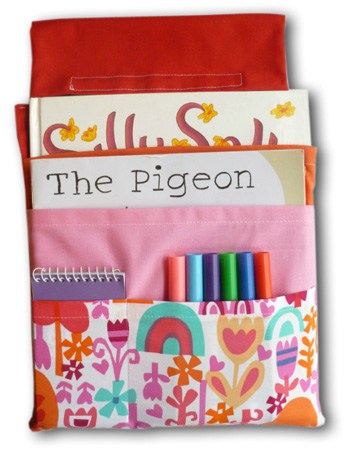
With summer time in full swing, I bet a lot of you are trying to fit in those last minute vacations before the kids go back to school. Long car rides can be a strain on parents and children and most likely the kids will be bored, if not asleep. For my kids, I like to pack along a lot of books, notebooks and markers for them to have plenty to do in the backseat. With this tutorial, you can create a handy fabric organizer with slots for them to tote all of those things they like to bring along with them in the car.
This project is for a backseat organizer that can hang from the back of the front seats. There are two large pockets for carrying books and two smaller pockets for notepads, markers or crayons.
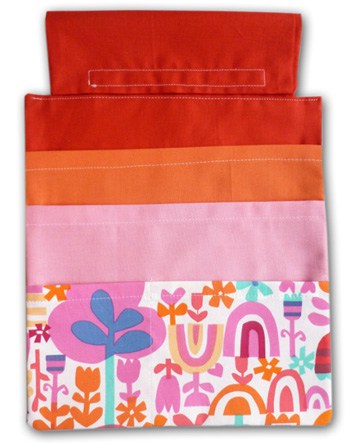
The one you see here was custom made for a friend of mine who drives a Dodge Caravan that has these handlebar things on the back of the seats. I figured that this is probably a pretty common minivan, so some of you may be able to utilize the Velcro flap. For everyone else who will just want to hang it from the headrest, I will include an alternate way to make it hang for you.
Materials needed:
- Fabric
- Sewing machine
- Scissors
- Iron
- Velcro
In this project, I used 4 different coordinating fabrics. I will refer to each by color but, of course, color choice is ultimately up to you for your own project. I used a ½" seam allowance in this project.
Of the red fabric, cut 2 pieces out at 11.5"W x 12.5"L and one piece at 9.5"W x 14"L (for the Velcro flap.) Cut one orange piece out at 11.5"W x 11"L. Cut one pink out at 11.5"W x 9"L and one printed fabric at 11.5"W x 6.5"L.
Set aside the red pieces and hem the tops of the other fabric pieces by folding down ½" twice and stitching across. I find that pressing first makes it easier than pinning.
If you would like to have the divided pockets made for the notepad and markers, now is the time to do it. I wanted to have little spiral notepads in mine so I measured the width and added an inch for seam allowance and wiggle room. That measurement is how far in I placed my vertical stitch. Place the printed fabric on top of the pink fabric and line up the bottom and sides. Be sure to use a couple back-stitches to reinforce the top.
Lining up the bottoms and the sides, lay out the print, the pink and the orange fabric on top of one of the red pieces and sandwich them by laying another red piece on top of that.
Pin on the sides at each hem. This is to prevent them from shifting while you sew.
Before you start sewing, fold down ½" at the top of the red fabric, flip over and repeat. Press a crease with your iron. This is the edge where you will turn the whole thing right side out and having these creases will help you to be able to sew it shut with ease.
Now you can sew around the edges, leaving open the top where you made the creases. Don't sew the folds down though. Open it back up and sew it like it is pictured above.
Don't forget to clip your corners!
Now flip the entire thing right-side out making sure your pockets are facing out. It can be a little tricky with all those layers. Can you see why pressing before you sew was a good idea? Your edges are already lined up for you on the top!
You're ready to work on the flap now, so you can set the pockets aside and get out that remaining red piece of fabric.
Fold it in half lengthwise, matching up the short ends. Sew up the two sides, clip the corners and turn right-side out.
Add a strip of Velcro to the bottom near the raw edges leaving a bit of space for seam allowance and add the matching strip to the top.
Insert the bottom of the flap into the opening of the pockets, taking care to center it. Pin in place if you have to. Stitch across the whole top of the pockets piece and you're finished!
Alternate version: For those who wish to hang from the headrests, instead of making the Velcro flap, you can stitch two long fabric strips into the opening to tie around the headrest. Or you could stitch both ends of one fabric strip in the opening (kind of like a purse handle) and it can slip on if you have headrests that can be removed.
These pocket organizers can be easily removed and used to tote around books and stuff where ever you go. Handy for going places like doctor's office waiting rooms or the tire repair shop. This has saved us countless times when car rides or waiting is no fun. I know that this will be helpful for you and your kids, too!
...........................................................................................................................................................
 About Yvette O'Brien
Yvette hosts Abernathy Crafts or as she fondly calls it, “her little corner of the internet.” Stop by and you will find quick little sewing projects, home decor, paper crafting, and arts & crafts for kids. If it involves a sewing machine, glue, paper, fabric, power tools or paint and it doesn't take more than a day or two, she's willing to try it.
