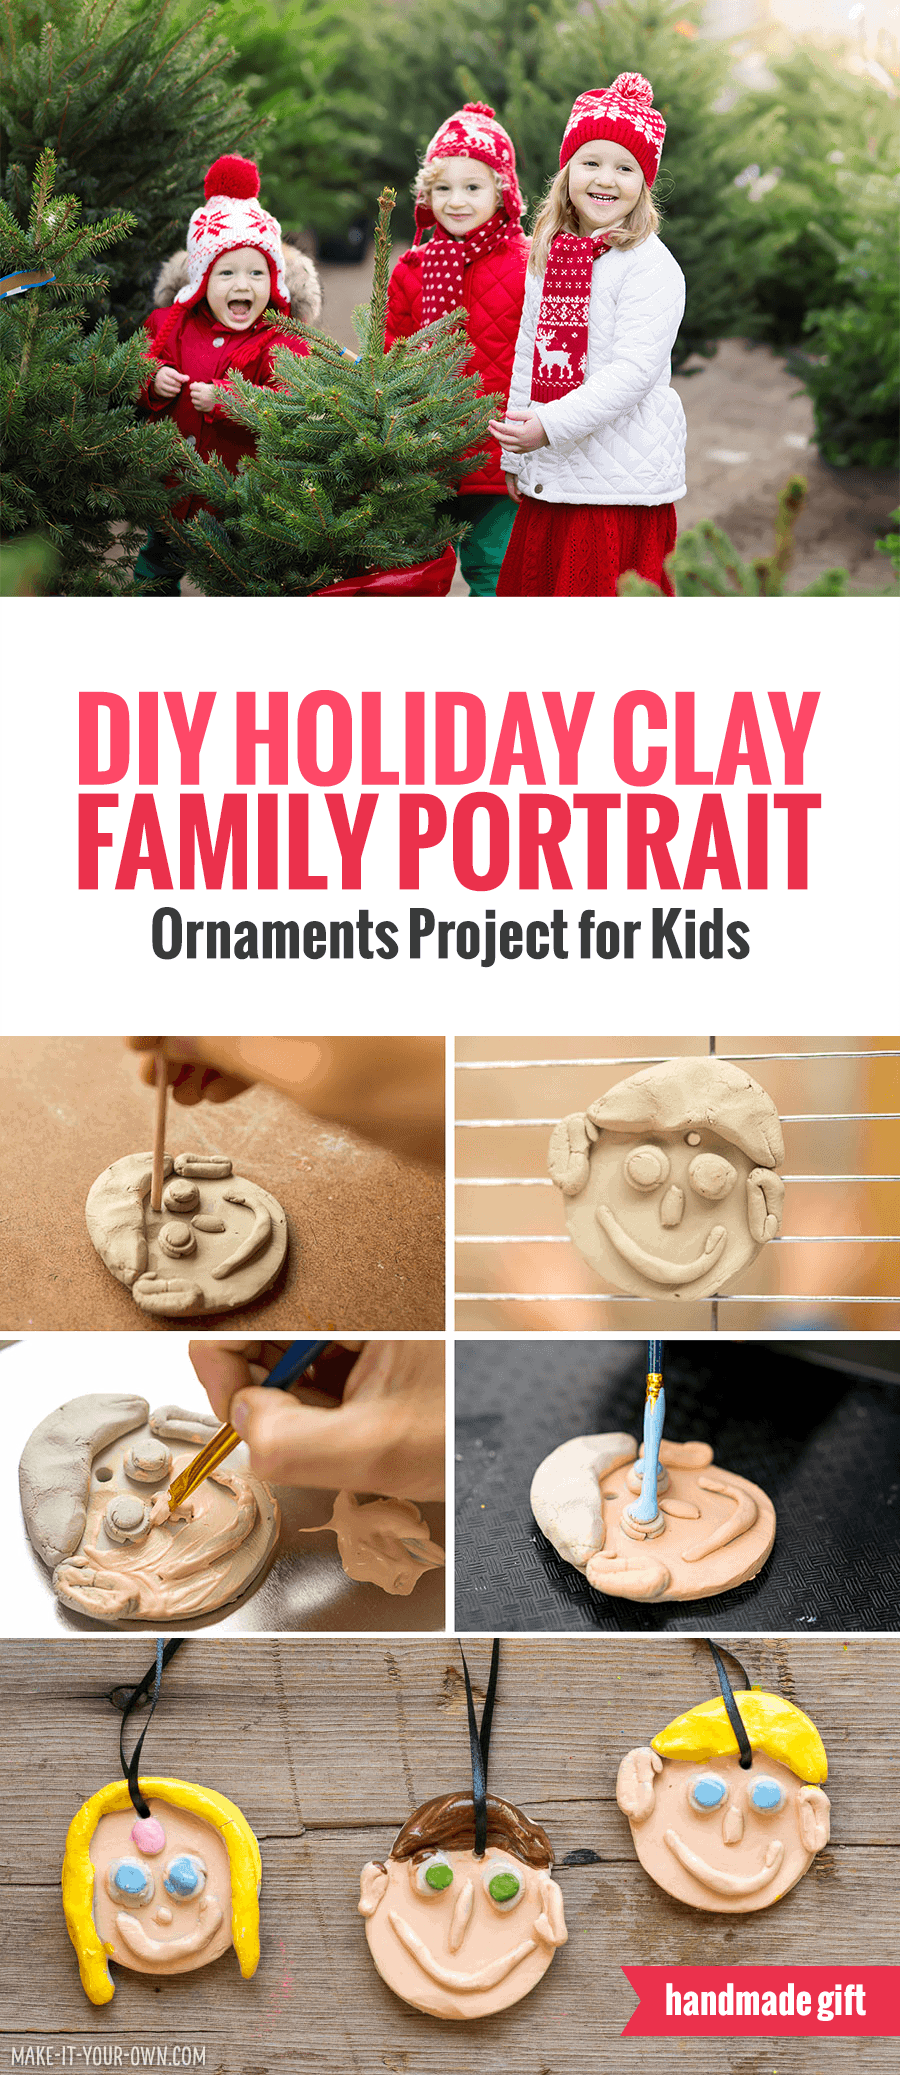
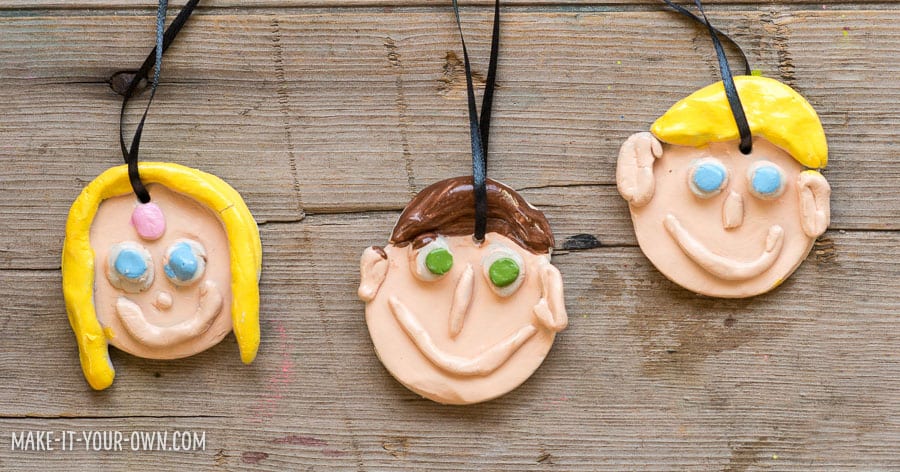
Working with clay allows one to develop and strengthen hand muscles and express creativity in a three dimensional medium. This activity gives the look of a glazed project without the use of a kiln. Wouldn't it make a lovely gift for Grandma and Grandpa for Christmas?
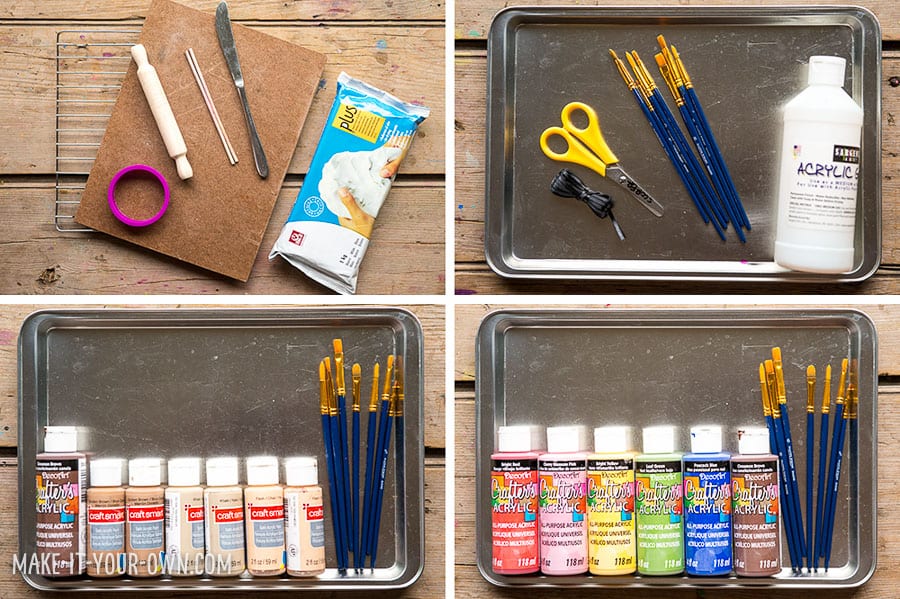
Materials
- Air dry clay
- Rolling pin
- Knife
- Circle cookie cutter
- Dowel or bamboo skewer with the end cut off
- Cooling rack
- Acrylic paints (in various skin tones), brushes
- Acrylic paints in various colours (for eye colours, hair etc.)
- Fine paint brushes
- Acrylic gloss
- Thin ribbon
- Scissors
- Permanent marker (*Optional)
We always find these items helpful too:

- Smock
- Craft tray
Directions
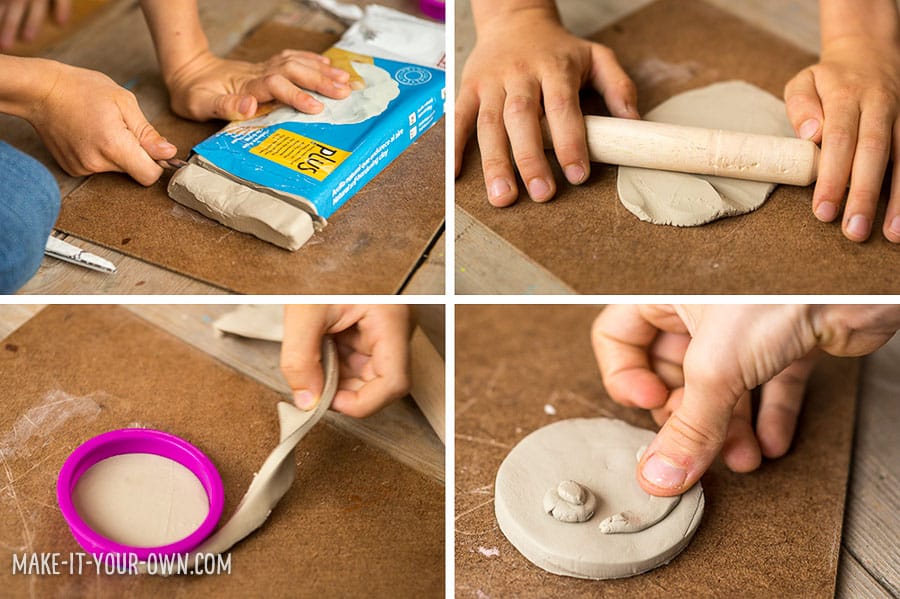
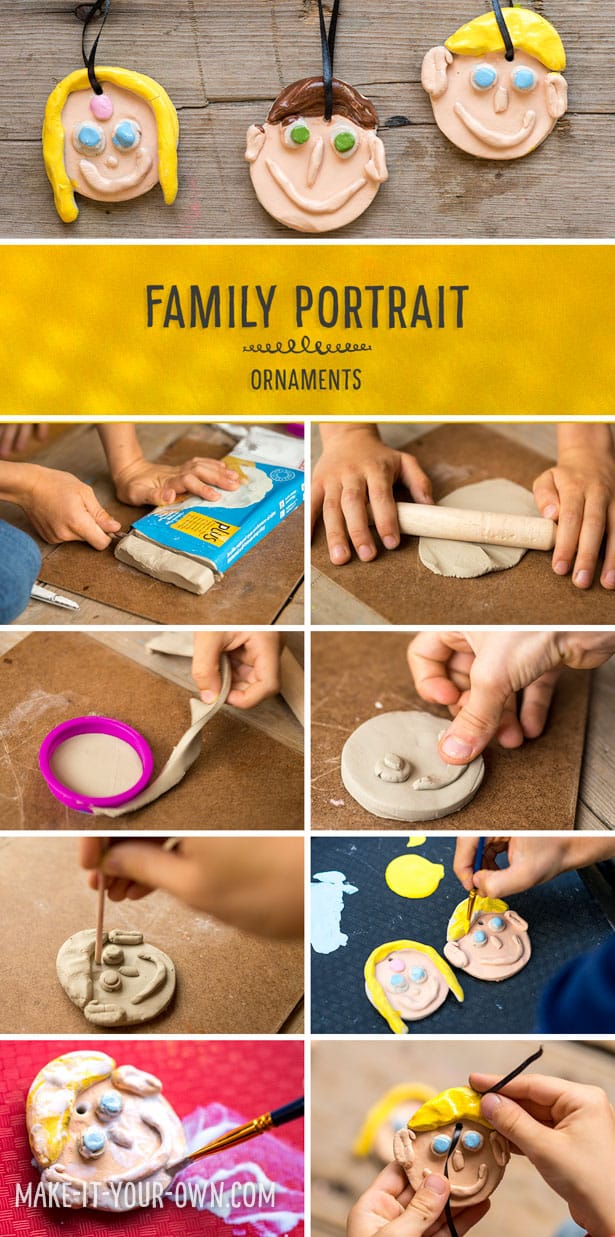
- Don your smock. Cut off a section of clay to work with. We rolled it out and used a circle cookie cutter to make a simple base for our face. The thickness was about 1 centimetre/ a bit less than ½ an inch.
- Using your hands, make the details of your face- your eyes, nose, ears, hair etc. Add them to your circular base.
- Make a hole in your forehead using the end of a thin dowel or bamboo skewer with the end cut off.
- Place your completed face on a cooling rack and allow it to dry. The cooling rack allows for air circulation so that the clay can dry on the bottom as well.
- Once your clay is throughly dry (this may take overnight or several days, depending in the temperature and humidity where you live), paint your skin tone onto your clay. Allow to dry. Using a craft grade acrylic that is less viscous tends to be easier to paint with for this type of project.
- The next layer of paint is the details of your face- your eye colour, hair colour, the shade of your lips. One tip when it comes to working on art projects with children is encourage them to work slowly and carefully, creating a picture in their mind before commencing with the actual painting itself. If something does not go as planned, wipe it off with a paper towel or cotton swab. The benefit of acrylic paint is, generally, you can simply paint over something with the intended color, using a few layers. Allow to dry overnight.
- Now for the part that creates the faux glaze look. Paint your face with a layer of acrylic gloss (you can get this at art and some large craft stores). Depending on the piece, you may need to paint two layers, allowing a drying time in between.

- Once your face is completely dry, handle it carefully and poke your dowel through the hole again (in case any paint got in there), clearing the channel. Lace your ribbon through, knotting the end.
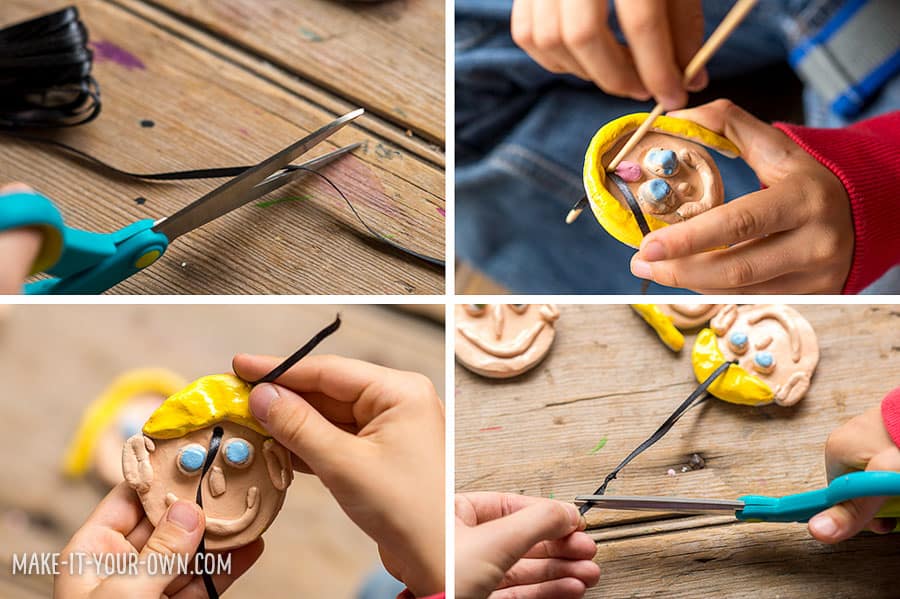
- If you like, write your name and the date on the back of your face with permanent marker.
- Hang your face in your room, on a Christmas tree etc.
Purpose
- Working with different materials to create three dimensional objects.
- Using various types of paint.
Safety Notes
- We suggest that you wear a smock and use a craft tray to protect your clothing and surfaces.
- Use scissors with care and adult supervision.
- Ribbon, cord, yarn etc. can be a strangulation hazard, therefore be sure to use with direct supervision and for its intended purpose.
- Check products are non-toxic before use with children.
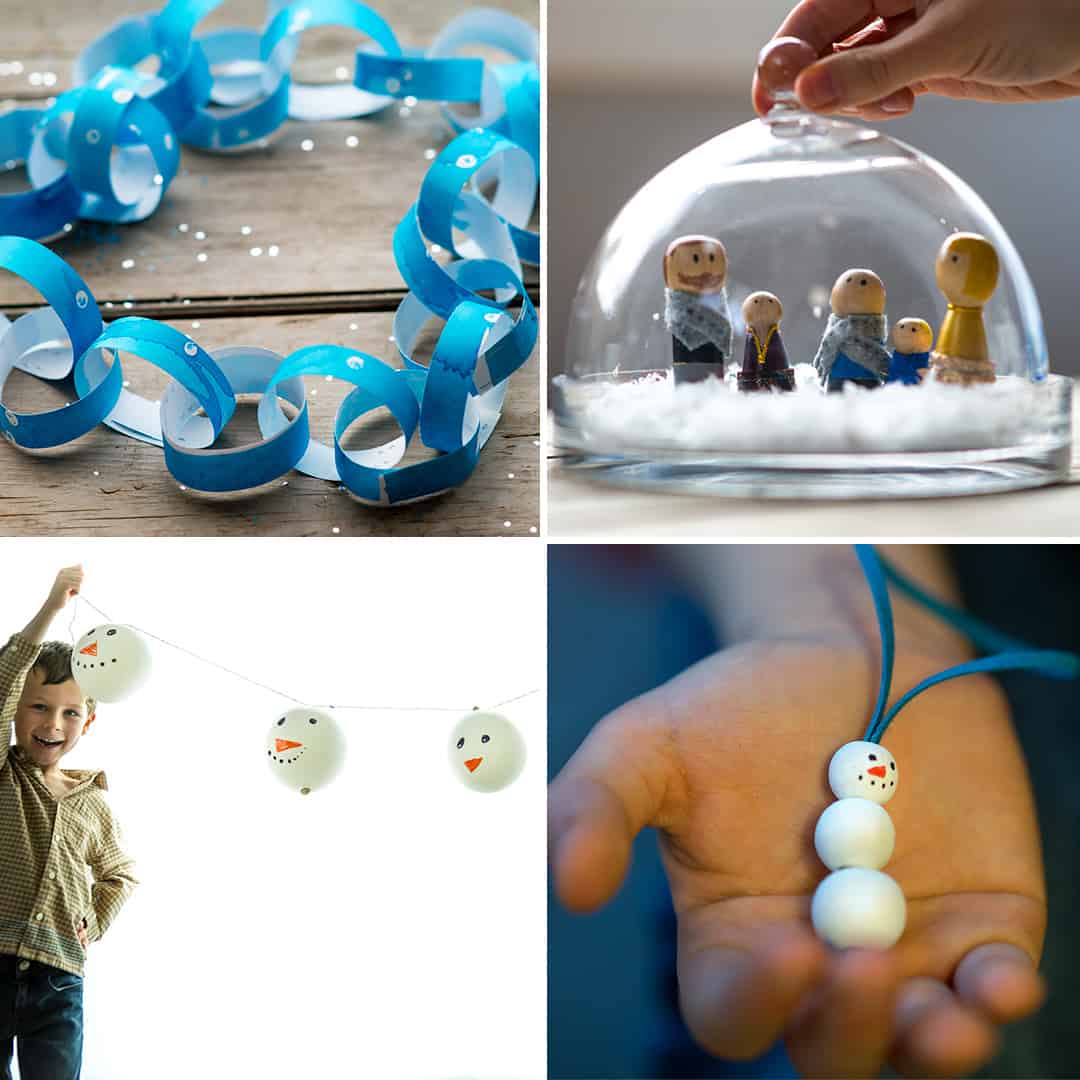
Looking for more wintery ideas?
Stop by Make It Your Own for creative inspiration for your family.
![]()
![]() Make it Your Own is a place to explore both new ideas and re-envisioning others. With a background in interactivity and education, Bonnie and Galen hope to get you and your children engaged in activities that extend the digital experience by outdoor exploration, creating etc.. Please join them and their children in collaboration.
Make it Your Own is a place to explore both new ideas and re-envisioning others. With a background in interactivity and education, Bonnie and Galen hope to get you and your children engaged in activities that extend the digital experience by outdoor exploration, creating etc.. Please join them and their children in collaboration.
Find Make It Your Own online here →
Blog | Facebook | Instagram | Pinterest | YouTube
Getting creative with crafting is a great way to bond with each other as a family. Check out a few more fun craft ideas, perfect for creating memories together!
![]()
Pin it: