Did you know that you don't need needles to knit? (I didn't!!) I am–at best–an amateur knitter, and I wondered if I could teach my children even the simplest stitch. We have been creating some fantastic projects (much to my surprise) thanks to a great resource. Check out the book called Knitting without Needles written by my friend, Anne Weil. We've been using our fingers!! Finger knitting has become the rage in our house of tween-age girls! From scarves to hats, blankets to poufs, stuffed toys to wall decor, finger knitting offers a variety of projects with the use of soft, bulky yarn now found on all the shelves of our favorite craft stores.
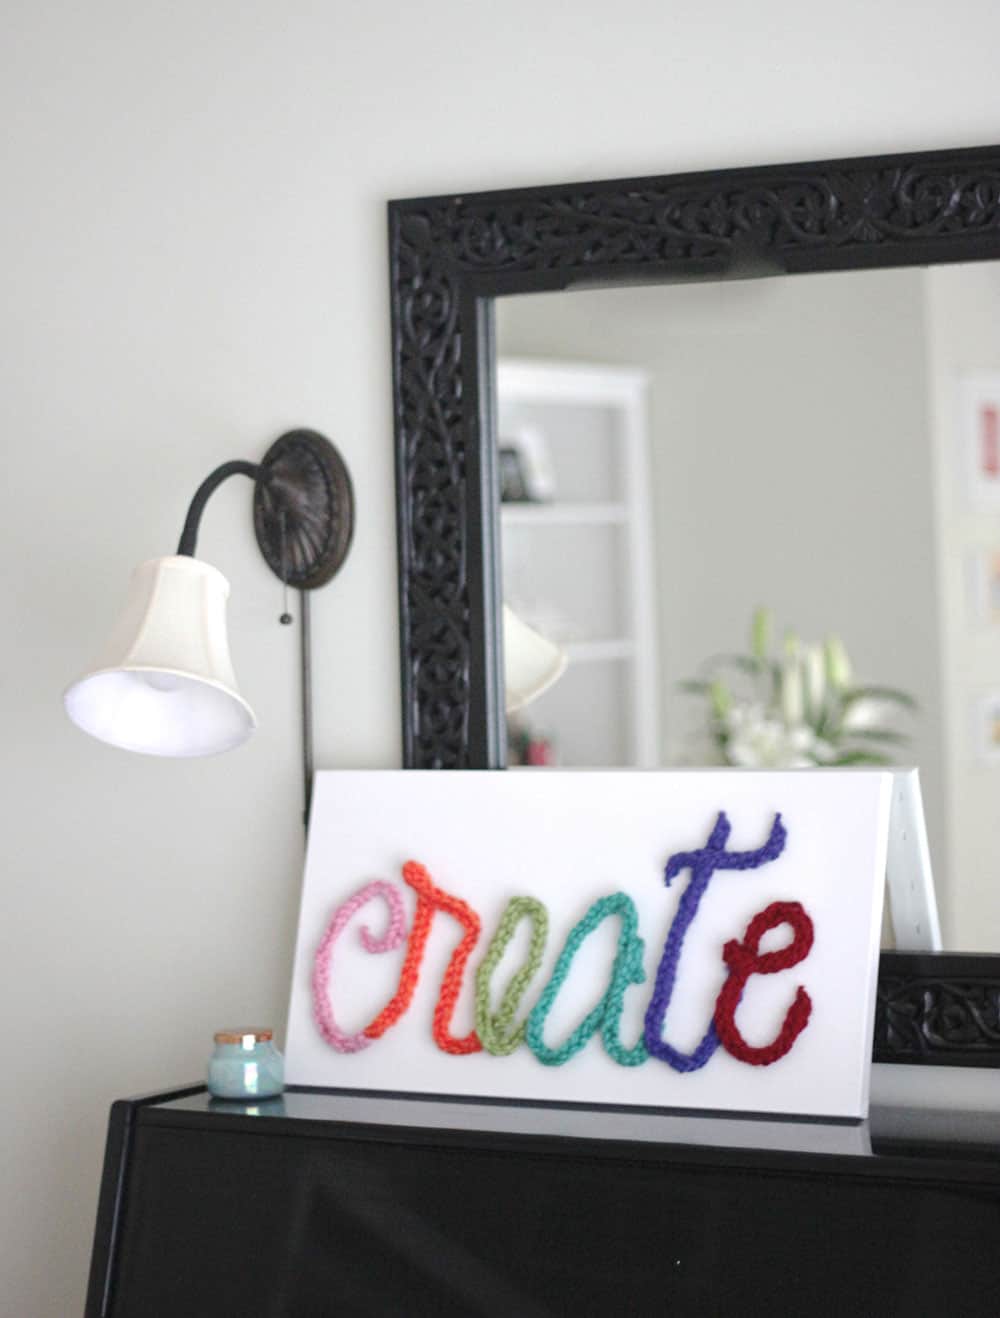
Depending on what you want to create, you'll decide on your stitch. My oldest daughter and I wanted to make a word out of a chain of knit stitches. We settled on the word CREATE and selected our favorite colors to make each letter. Consider purchasing yarn with the designation of 5 or 6 so that your letters have some bulk to them without much knitting.
Materials you'll need:
- Skeens of bulky yarn (5 or 6) - the amount will depend on how many different colors and letters you'd like to create
- Scissors
- Floral wire or similar gauge
- Canvas (we used a 12" x 24" inch)
- Fabric or hot glue
Creating a simple fishtail chain
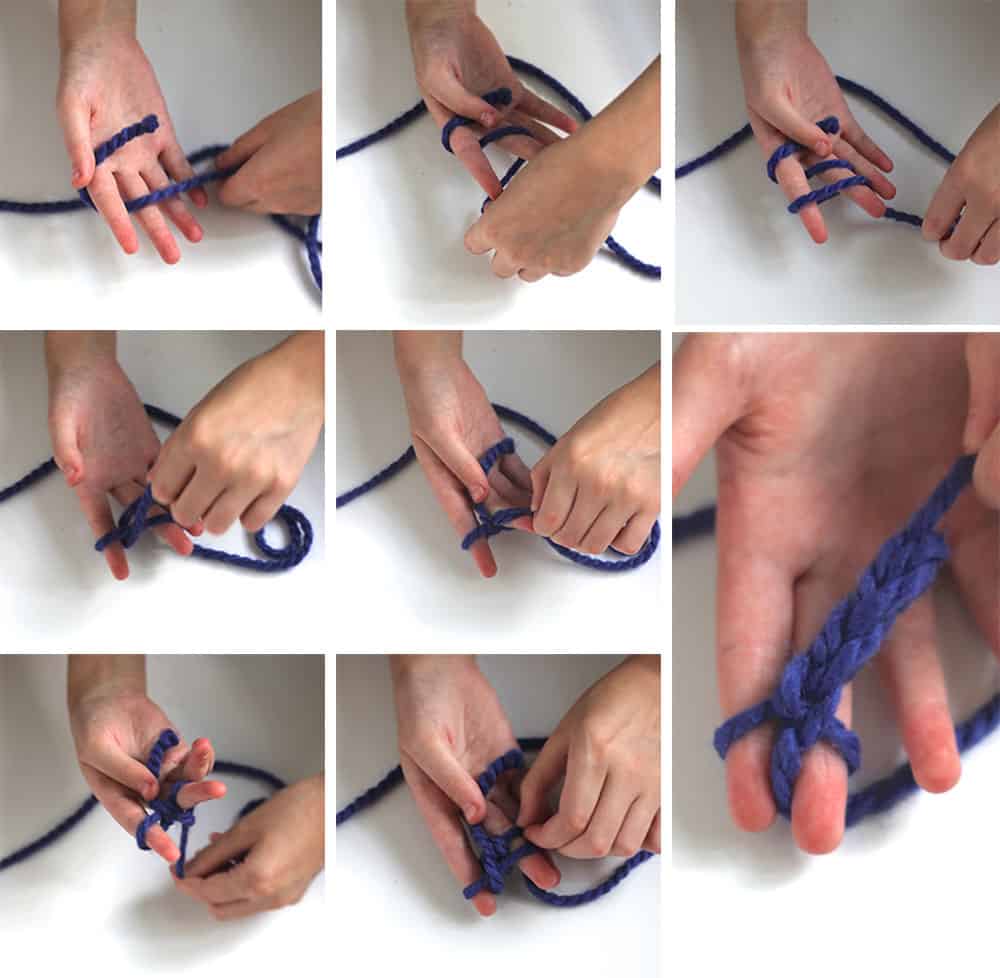
If you haven’t tried finger knitting, the concepts are similar to traditional knitting, with your fingers acting as the needles. In this project, we used a two-finger knitting process. You can follow our sequence above or check out this simple video to see it in action.
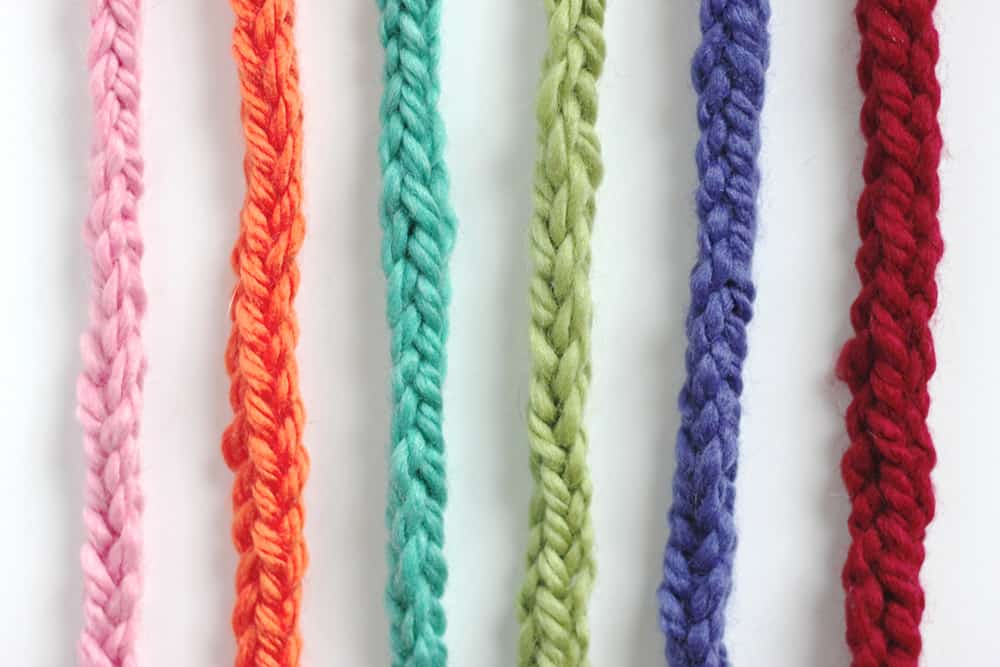
We created six chains about 18 inches long and then laid them out on a 12" x 24" inch canvas to see how we wanted the letters to work together. For some of the letters, like the Es, our chains were too long. What to do?
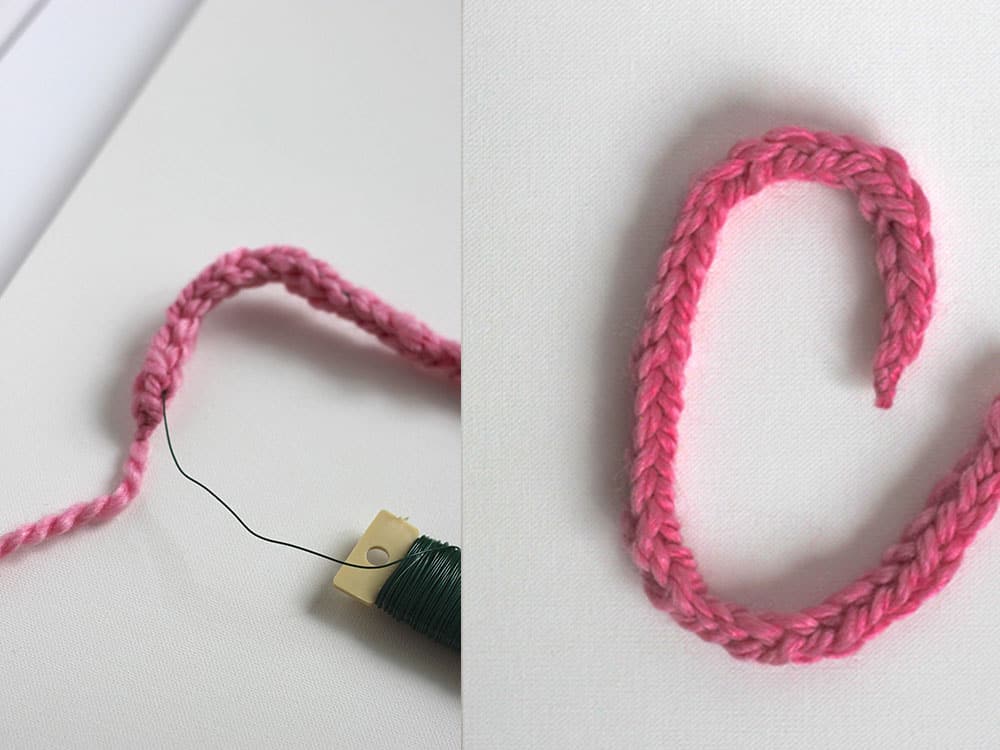
Simply cut the chain to the size that you want it. You'll have two small scrap pieces of yarn that can be tossed and a loop and end string. Put the end string through the loop and pull to tie off the fresh, shorter end.
Next, take your wire and thread it through the center of the knit stitch. This process is not difficult but does require a bit of patience (so says my daughter) to make sure that the wire stays hidden and the knit stitch is thread evenly. Once you have one letter done, cut the wire, and move on to the next one. We made each letter on a different piece of wire to simplify the process.
Shape the letters to form the letters as you'd like them to look, keeping in mind that some letters might need more attention. For example, the lowercase A has an overlap of stitched wire, and the T is created in two separate pieces.
The final step is the glue! Add glue on the back of the letters where they touch the canvas. We didn't glue the entire back because we wanted to leave some dimension to the piece - like it was coming off of the canvas.
And now we have a beautiful art piece, that we created together, and have proudly displayed in our art and music room, atop the piano. If you're looking to try some yarn crafting, give finger knitting a try!
xoxo, MJ
Looking for more ways to get creative? Check out these fun ideas:
Printed Flowers From Recycled Items
Creating Calm in the Midst of Chaos


